LookerStudio - Google Sheet
If you do not wish to use the preconfigured Cadulis data source, you can, for example, use a Google Sheet file. This file will contain your data and will update automatically.
Spreadsheet
Go to https://docs.google.com/spreadsheets and sign in with your Google account if necessary.
Create a new spreadsheet.
This spreadsheet will host the updated data from Cadulis.
Update Script
Now we want to integrate our data.
Click on Extensions then Apps Script.
A new window will open.
Apps Script
The window that opens corresponds to the script linked to your Google Sheets spreadsheet.
Script Code
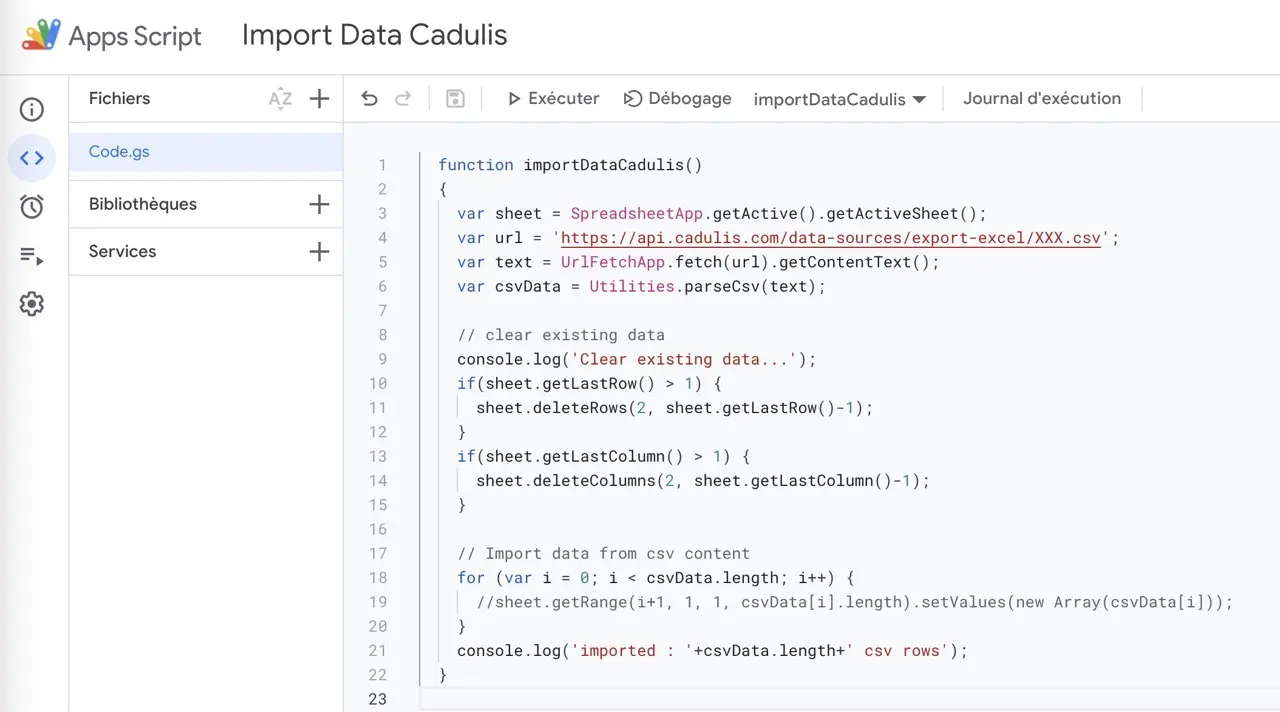
Once in Apps Script, replace the contents of the Code.gs file with the following code:
You must replace
[CODE_CADULIS]in the code below with your own data source identifier.This is the code you noted in the Prerequisites section.
Sample Data
You can also use our sample data source:
https://api.cadulis.com/data-sources/export-excel/XXXXXXXXXXinterventionsXXXXX.csv
Use this URL below and you’ll immediately have some data to practice with!
function importDataCadulis()
{
    var sheet = SpreadsheetApp.getActive().getActiveSheet();
    var url = 'https://api.cadulis.com/data-sources/export-excel/[CODE_CADULIS].csv';
    var text = UrlFetchApp.fetch(url).getContentText();
    var csvData = Utilities.parseCsv(text);

    // clear existing data
    console.log('Clear existing data...');
    if(sheet.getLastRow() > 1) {
      sheet.deleteRows(2, sheet.getLastRow()-1);
    }
    if(sheet.getLastColumn() > 1) {
      sheet.deleteColumns(2, sheet.getLastColumn()-1);
    }

    // Import data from csv content
    for (var i = 0; i < csvData.length; i++) {
      sheet.getRange(i+1, 1, 1, csvData[i].length).setValues(new Array(csvData[i]));
    }
    console.log('imported : '+csvData.length+' csv rows');
}
Click on the icon to save the script.
You should have the following:

Initial Update
Click on Run
You must authorize the script to connect to Google Sheets.
Google Security
You will probably need to confirm the “unsafe” action, as your script is not recognized by Google.
If you see the message “ Google hasn’t verified this app”:
click on “Advanced settings”
then “Go to [Name of your script] (unsafe)”
In the execution console, you will see the number of imported rows.
On your Google Sheet file, you can check that your import content is correct.
Scheduled Update
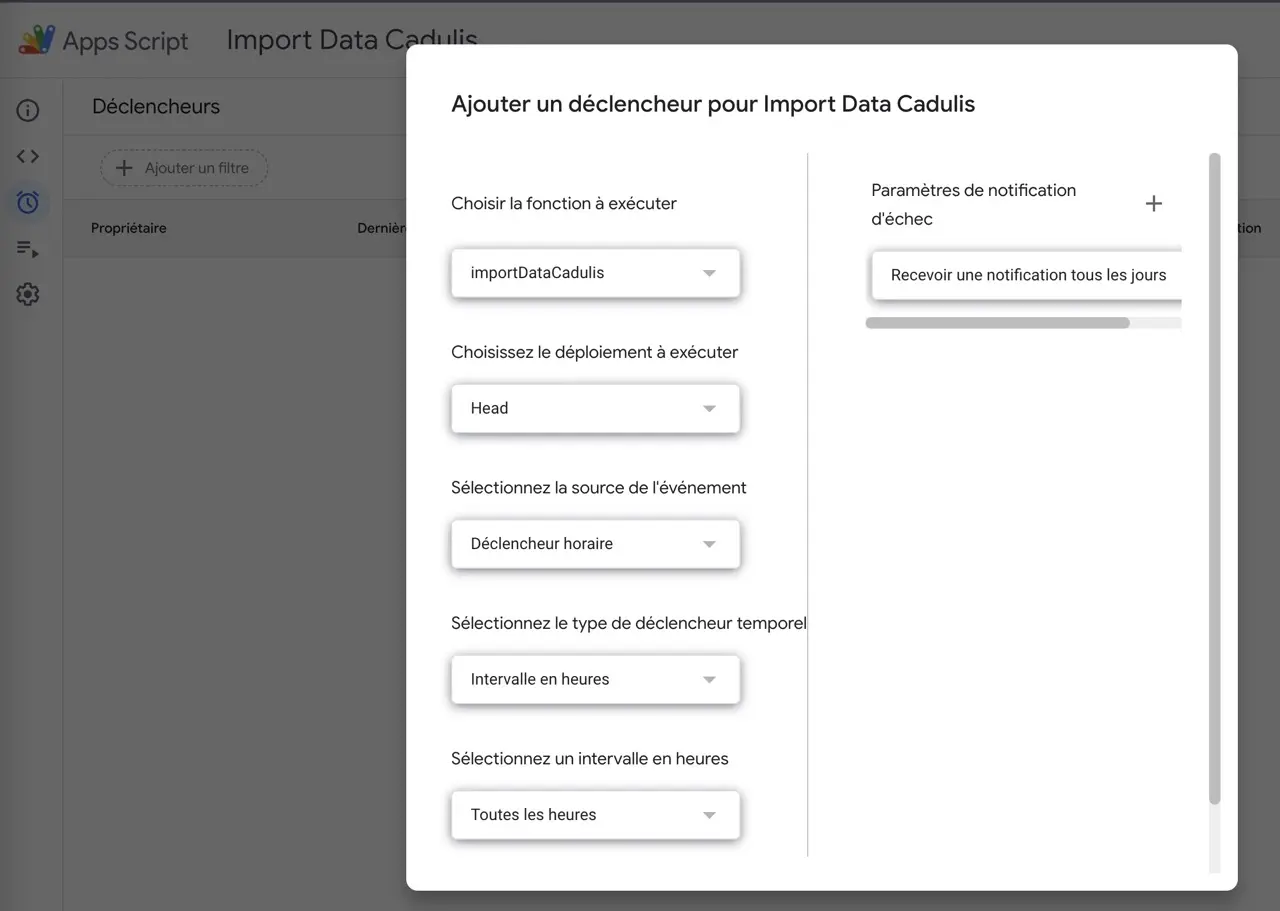
Still in Apps Script, in the left menu, click on Triggers
Add a trigger, making sure to select Time-driven trigger as the event source.

Choose your frequency and save:
Your Google Sheet is now updated automatically!
You can now proceed to configure your LookerStudio data source ;)


